Friday 26 April 2013

how to hide the partitions ?


How to Hide the Partitions?

how to hide the partitions ?
By Crack001.com
This trick is for all those people who wants to hide tons of data into their box. So here it is, if you have very important data in your hard drive placed in some partition which you do not want anybody to see then this trick is only for you!!!


  1. Just click on start>run type gpedit.msc
  2. Now navigate through user configuration> administrative templates > windows components> windows explorer
  3. Double click on “Hide these specified drives in My Computer” modify it accordingly.
  4. Then just below you will find another option “Prevent access to drives from My Computer”, double click on this option and modify it accordingly.
  5. To make it visible again select "disable" by double clicking on the “Hide these specified drives in My Computer” option.


WARNING:

Don't try to experiment with other options in gpedit.msc if you don't know, what exactly your doing. Just have some patience and follow my tutorials regularly, i am going to tell you everything that is configurable in windows [and those also which you thought before, "Seems not possible to change ;-)" ].
***anyways if you having any problem to apply this trick, comment me. You will be helped.
That's it for today. Have a nice day ahead.

Sunday 7 April 2013

Free Email address Using Your Website Domain


Create Free Email address Using Your Website Domain with Google Apps


create Email with google appsOne of the very first things that any web owner likes to do after purchasing a domain is setting up a branded Email address ending with the domain name. Blogger users who purchase a domain often find it difficult to set the MX records in their webhosting account, thus they don't bother using a branded email address. If your website address is www.example.com then your branded email Id would look like yourname@example.com. You will be able to access it using the address mail.example.com. The best thing about todays' tutorial is that we wont be using inefficient webmail services like roundcube, squirrelmail or horde that you often find in your hostgator webmail clients. We will be using Gmail, which means you will manage all emails received at your website's email address straight in your very own custom Gmail account. You can also create up to 10 email addressesusing your domain without paying a penny with Google Apps. You will stay safe, protected and most importantly served well.  Lets now create a Gmail account for your company's website or blog and connect it to your web host in easy steps.

Google Apps Services 
Part1: Create Free Email address For your domain with Google Apps
Part2: Google Short Links - Create Shortcuts to URLs
Part3: Create short URL For Email & other services in Google Apps
Part4: Connect your Website Emaill address To Gmail
Note: This post may seem too much techy but its really simple to apply and all fun! So act like tomb boys and give it a try. :)

Steps To Create a Gmail Account For a Website

You will get a free 10GB storage to save all your emails no matter how loaded they may be with rich media. 
Follow these easy steps:
  1. Go To Google Apps for Domains
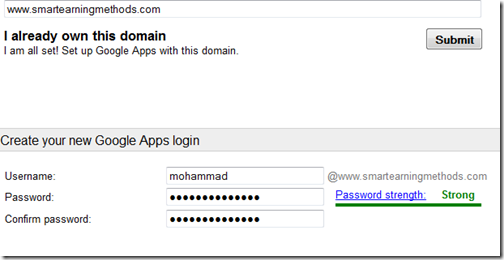
  2. Submit your website address without typing http://
  3. Then fill up the vacant blanks with required information. Keep your username simple because this will be attached to your domain name to create your custom Gmail account username. In my case I choose Mohammad for my sister blog.
setup email with googleapps
      4.  Keep Alternate email address the same as your personal Gmail ID or any ID  that you use frequently.
      5. Click the submit button to create your account

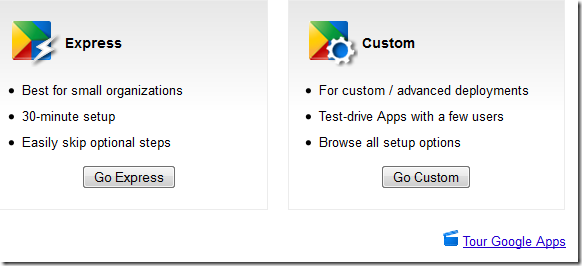
      6. You have now successfully created an account with Google apps. Now you need to verify that you actually own the domain. You will be given two options Express and Custom. Choose express.
express and custom googleapps
   7.   Click the next buttons till you get to Domain verification page. Here you get 5 options to verify your domain which are:
  1. Upload HTML File      (Recommended Method)
  2. HTML Tag            (under alternate Methods tab)
  3. Google Analytics       (under alternate Methods tab)
  4. Domain Name provider       (under alternate Methods tab)
Choose the second option of HTML Tag because it is the easiest of all. Copy the simple Meta tag and paste it inside your template just below <head> section. 
Tip for Genesis Users: 
Once done, hit the verify button and you are half done. 
domain verified
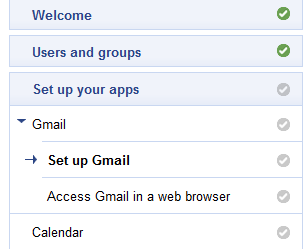
Click the continue link and you will be taken to Google Apps Setup wizard. You may keep all options default and keep clicking next till you reach setup Gmail:
set up gmail
Choose other from the drop down box which says "Choose your Host" Click Next
Setting up MX Records
Here you will be given four MX entries that you need to submit to your webhost. 
MX records
You will need to log into your web host account and navigate to DNS Manager or DNS settings. DNS zone is also called DNS ManagementMail Server Configuration, orName Server Management, depends on your webhost. I will be sharing here the settings for hostgator here which will give you a clear observation on what to do.
Setting For HostGator:
  1. Log in your Control Panel
  2. Click the MX entry icon just under Mail
  3. Choose your domain
  4. Set Email routing to Automatically Detect Configuration
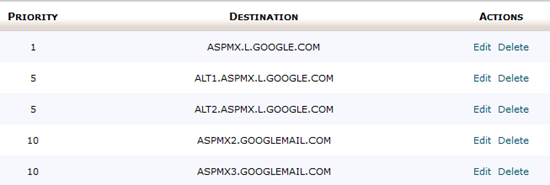
  5. Now enter 5 MX entries one by one inside the Records box.  These MX entries are given to you by Google apps. While entering the destination remove the dot in the end. For example ASPMX.L.GOOGLE.COM. should be entered asASPMX.L.GOOGLE.COM
MX entry hostgator
     5.  When everything has been entered correctly it will look like this:
MX entries for googleapps
Note: If an MX entry exists by default, you may delete it and keep only the above 5 MX entries. It will take 24 hours for your Email to connect to Google servers so be patient
Go back to Google apps and keep on clicking next till you complete the wizard. Though completing the setup wizard is not necessary but to avoid the irritating prompting messages better complete it. 
Congratulations! You have now successfully created a custom Gmail address for your website. . 

Create Custom Email Web Address

To access your account you will need to follow a standard long web link. Ours looks like:
https://www.google.com/a/cpanel/smartearningmethods
In our coming tutorials we will learn to create a more professional and short web address like this one:
mail.smartearningmethods.com
Stay tuned!

Connect your Gmail Accounts

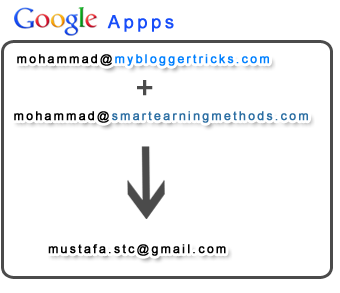
The Gmail account you just created is different from your primary Gmail account that is used for personal use. In order to manage this new account using your primary account we will need to connect these two accounts so that all mails sent to yourname@example.com are received at yourname@gmail.com. For this you will need a Gmail account as your primary mailing service. It wont work with Hotmail or Yahoo. To learn how to do this please stay tuned for tomorrow's tutorial.

TRACE MOBILE NUMBERS OR IP-ADDRESS


TRACE MOBILE NUMBERS OR IP-ADDRESS


Recently I came accross a website in which we can easily trace a Mobile number. 
For example , when we enter the 10 digit mobile number, then we get the Mobile Service provider, Location, City along with area. 
Thats really awesome.

This tool will be really helpful specially for business persons to verify the location etc…

The site link is 

indiatrace.com


Features of this site is


Trace Vehical Number

Trace Pin Code
Trace IP Address
WHOIS Trace

Saturday 6 April 2013

8 ways to access blocked websites

 8 ways to access blocked websites


1. Using IP instead of URL

2. Redirection with short URL service

3. Google cache

Search engines like Google and Yahoo cache webpages and these cached pages are stored in search engines themselves, which likely will be added to the blocked list. Click on the ‘cache’ will bring you to a cache version of the page, as updated as how Google caches it.

4. Internet Archive – Wayback Machine

Wayback Machine is a internet service that periodically keeps a copy of almost all websites in the Internet way from the date they’re started. Clicking on the latest copy of what Wayback Machine have should be somewhat similar to the real site.

5. Anonymous surfing

Hidemyass.com
- anonymizer.com
wujie.net
ultrareach.net


6. Use Proxy in Browsers

7. Bypass with translation services

Use Google translate. Open Google translate ,type the URL and translate page.

8. Retrieve web pages via Email

Web2Mail is a free service that sends websites you want to read right into your inbox. All you need to do is send an email to www@web2mail.com with the URL as subject title.